Most gardeners have been reporting excellent-looking garlic in their beds this spring and summer... but now it's time to think about harvesting. This week we will look at when to dig your garlic.
The finishing touches matter...
Like many root crops, the final week or two that garlic is in the ground significantly contributes to the final size. So, getting to know and mapping out your harvest time for garlic is an important skill as a food gardener. The good news is there are some easy-to-recognize signs to guide you.
Before getting into the harvest, let's take a quick step back and remember that garlic is typically planted in October in zone 3, which allows the cloves to root in the fall, emerge as a leafy plant in the spring and then mature through the summer. Only garlic planted in the fall will develop full heads. If you happened to plant your garlic in spring, you will find that the rest of this post won't match with your garlic situation; the good news is that big or small, any garlic you harvest will be tasty!

Harvest time clues...
In early July, hardneck garlic starts forming scapes. These are the stems that end with a bulb-like head and pointy tip; if you have never harvested scapes you can look forward to doing so next season, they are delicious! At first, the scapes will curl and stay relatively low to the ground (which is when they are tender and super tasty) but as July turns to August the scapes stretch upwards becoming tall and straight (at which point they are no longer edible, due to toughness). It is worth marking the date you first notice scapes on the calendar, as harvest is generally four weeks later.
Calculating harvest based on the presence of scapes plus four weeks is an excellent start, but there is more. With garlic, the above-ground leaves continue below the soil and form the protective wrapper that surrounds the cloves. Once garlic plants have reached maturity the tips of the above-ground leaves will start to dry out; when three leaves show clear signs of drying it is time to test dig.

When digging, go slowly and start a little wide. The bulbs are thin-skinned at this point and if they get nicked they will not be able to store. I like to do a preliminary dig with the trowel, then get in with my hands for the final loosening. Another option is to firmly the plants up by the stalks, which is quick and easy!
Careful digging...
Test digging is the best way to hone in on the best harvest. There can be considerable range year-to-year with garlic, as winter conditions, moisture and heat all have a significant bearing on the size of finished heads. Test digging allows you to get a good idea of where your crop stands without pulling your full crop too early. It is worth keeping in mind that leaving garlic in the ground too long makes it impossible to cure for storage (if the leafy wrappers come off) while harvesting even a week too early will yield small heads - so having a look underground at your first hunch of readiness is a worthwhile practice.
Knowing when your crop has reached its peak size is still a bit of an art, even with the above clues. Some additional indicators will be that the heads are not getting any larger after a couple of test digs, and for sure if the tops have dried down beyond the tips you are good to harvest. Keep in mind that different garlic cultivars range in mature head size, and as mentioned, some years the crop will just be smaller. If you happen to wait too long, and the wrappers are separating from the cloves, you can use this garlic fresh or preserve it by freezing.

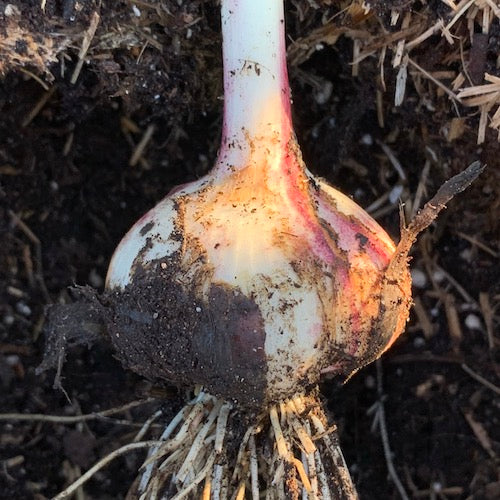
The garlic pictured above was dug as a test this weekend (July 30), which is three and a half weeks after the first signs of scapes, and with a few leaves turning brown. It is a little small, so I'll use it fresh and do another test dig in a week. Once dug, it is not easy to effectively replant the heads if too small... so best to eat them!
Curing for storage
Once your garlic is out of the ground, there are some simple steps required to improve storage life; this is called "curing". Essentially, curing involves air-drying your harvest, then cleaning your bulbs. Step one is to lay your freshly dug bulbs, including roots and above ground shoots, onto clean newsprint or cardboard in a well ventilated location (free from moisture and direct sunlight). For two weeks, it is ideal to turn the garlic once per day. After the initial drying, you can bundle the intact plants in small groups and hang to air dry for another two weeks. Yes, this is a process!! But putting in the effort post-harvest will drastically improve storage life.
After the air drying step, and once the plants are visibly dried out, you can trim the roots and upper shoots from the bulbs (leave about an inch above the head). Be careful not to disturb the papery layers around the cloves, as these protect your garlic and preserve moisture inside the cloves - very important.
After trimming your garlic is ready to use, and to be stored for winter; the ideal storage temperature is cool (around 15 C) with lots of air around the bulbs (mesh bags or clay storage vessels are ideal).
Planting Bulbils
During the harvest process, you may have bulbils (the baby garlic cloves found inside the heads of the scape) leftover, if you did not previously cut off the scapes. These can be used to grow very high-quality seed garlic.

Bulbils are essentially clones of your garlic and each one can grow into the beginnings of a new garlic head. Bulbils are not seed and do not come from flowers, instead representing a type of asexual reproduction found in some plants (Egyptian Walking onions are another edible allium that forms bulbils).
The thing about bulbils is that they take 3 to 5 years to mature into a full head of garlic, and each year they should be dug up, divided and replanted until you get to the desired maturity. Each year the young garlic will yield a fuller head. The up-side to all of this work is that bulbils offer the most true-to-type method for reproducing a particular strain of garlic; for this reason the best quality seed garlic is grown this way.
I know of three ways to plant bulbils: harvest and plant indoors, harvest and scatter in an outdoor "bulbil bed" or harvest and plant into shallow pots dug into outdoor beds.
The first method is popular for growers who want to have lots of control over the process, and it certainly makes it easier to keep track of the young plants. The bulbils can be stored for a few months, so it is common to plant these in plug trays in December or January under lights. The garlic seedlings are then planted out in spring, left in ground for their first full year, and dug in August of the second year for replanting.
The harvest and scatter technique is popular for the "let's see what happens" type of gardener! The bulbils are scattered in fall, a little soil sprinkled overtop, and essentially you come back and see what has grown the next August. It is of course important to recognize the young garlic plants in spring, and not weed them. Once again, for best results, the first year plants are dug and divided for replanting.
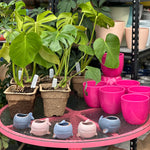
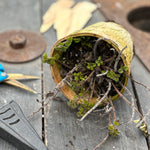
Lastly, you can have more control and keep things organized by planting bulbils into shallow pots that are set into the garden. Using pots helps protect the young garlic from some soil pathogens and insects that can be hard on young garlic plants - plus you can more easily keep track of the little plants and easily mark pots with different varieties of garlic in them. As with all methods, in August of the first year the plants are dug, cured, divided and replanted.
Hope you have enjoyed this garlic post!


