Seed starting can be one of the most satisfying aspects of being a plant person... then again, it can also turn out to be one of the most frustrating! To help ensure a great seed starting experience, it helps to remember that most seeds and seedlings have just a few fundamental requirements and ensuring these foundations are in place before the first seed is sown makes all the difference to outcomes.
Before we dive into the details on seed starting fundamentals, let's quickly review some of the reasons DIY seeding can be so worthwhile:
-
Saves money, especially for plants that many gardeners enjoy having lots of, like basil, cilantro, and annual cut flowers
-
There is so much magic in watching a seed develop into a new plant!
-
Many types of popular plants are easy to grow from seed, including for a wide variety of herbs, veggies, flowers and even perennials
-
Sowing our own edible plants teaches us (and those around us) so much about where food actually comes from
-
Home seed starting makes it easy to grow with sustainability top of mind, from choosing organic seeds and soil to mindful options for starter pots, not to mention home-grown plants have a much lower carbon foot print compared to nursery-grown equivalents
I want to emphasize, starting your own seeds is a really, really good idea if you can offer the young plants a few basic things. Seeds require the correct temperature to encourage germination (typically warmer than room temperature), seeds usually require contact with soil that is able to hold appropriate moisture and seedlings require direct full-spectrum light for around 16 hours per day. Sounds pretty easy, yet it can be a scramble to figure out how to provide these things once we have decided to grow our own (and unfortunately a bright window cannot provide during the winter and early spring). In today's blog, I am going to share a very simple set-up that supports just what the seeds need.
Simple seed starting propagator
Personally, I often fail to get things done when even one detail gets a little more complicated than I had planned for. As an example, when it comes to setting up grow lights, I will often think about a variety of too complicated ways to set them up, leading to a whole lot of paralysis. That is why I love this propagator: it only takes a few minutes to set up and all of the materials are very easy to work with no matter one's level of handiness!
The main materials required for this project are:
1) one heavier-duty 1020 nursery flat without drainage holes
2) a taller plastic humidity dome (ideally 7" tall and with vents)
3) two x 24" T5 lights with 6400K full spectrum bulbs (important to use 6400K daylight bulbs for healthy seedling development)
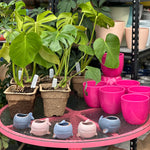
In addition, you'll have to decide on what types of pots or cell-trays you will use to actually start your seeds in, plus make or purchase a seedling-starter mix (full disclosure, Sage Garden offers a kit with everything required... so you don't have to worry about finding the tray, lights, dome or correct soil 🙂 ).
It is also necessary to have a ruler, indelible marker and sharp, pointy-ended scissors on hand for the few simple steps required to prepare the propagator.
When finished, the two T5 lights will be mounted within and supported by the humidity dome, providing perfect light in an environment that is both warm and humid - ideal for most seed starting. The T5 lights are extremely energy efficient and cool enough that they will not melt the plastic dome, yet warm enough to significantly increase the ambient and soil temperature within the propagator, encouraging faster, stronger germination.
Step one
Lay out all of your materials and and visualize what you are going to make. When completed, you'll have the dome sitting over the nursery flat with spaces cut out of the dome through which the lights will be mounted. Easy.

Step two
Grab the dome, ruler and marker. You will be making four cut outs in the dome for the lights, two at each end. Start by measuring approximately 2" down from the top of the dome on the end wall, and mark a straight line about 2" across onto the plastic (thinking about how the lights will fit through, and space accordingly). Repeat this so that you have four lines marked, two on each end, then use the single lines to trace out a rectangle above each one (each approximately 2.5" across by 3" tall).

Use your sharp pointy scissors (or a sharp box cutter) to carefully cut each rectangle out of the plastic.

Step three
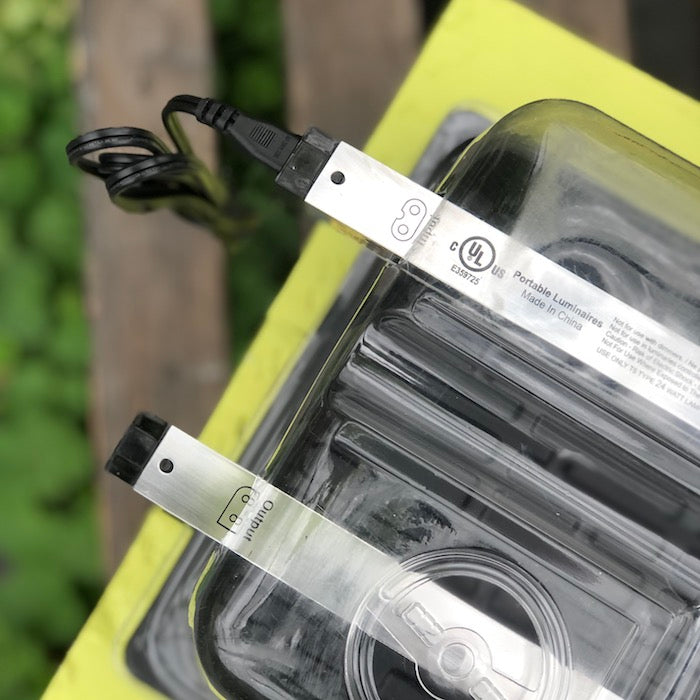
Insert your T5 lights through the cut outs, noticing that these lights have different types of receptacles at each end; set them up so that each side of the propagator has both a light with and input and output end (see photo).
(We work with Sunblaster lights, which come with included connector cables that make it super easy to daisy chain lights together so that only one outlet plug will be required [up to ten T5 lights can be connected!]. If you have different lights that do not daisy chain, you can ignore this step.)
Use a connector cable to join the two lights together, then attach the plug cable at the other end.

Now you can plug in your lights and test. If the lights don't both turn on, check that all connectors are firmly pushed in. Also double-check that both bulbs are tightly secured in the ballast (sometimes the jostling around that happens when setting the lights up causes the bulbs to be a little loose, and they don't turn on).
Remember that seedlings will need approximately 16 hours of light and 8 hours of darkness each day. There is no need for a timer, just turn it on when you get up and turn off when you go to bed.
We recommend applying Sea Magic kelp solution from the first watering onwards, then adding in Evolve Organic Seedling Starter fertilizer once seedlings have their second set of true leaves.
Seedlings will need to be transplanted out once their roots have filled their starter pots, or as they get close to the light bulbs (the mild heat from the bulbs can singe young leaves).
That's it, you are ready to sow!
A quick word on timing...
Aside from the conditions mentioned above, timing is exceptionally important to a healthy and satisfying seed starting process; you can check out our timing guide here, for many popular plants.